Welcome to alanarnette.com
Climbing the world to end Alzheimer's
|
Welcome to alanarnette.com
Climbing the world to end Alzheimer's |
|
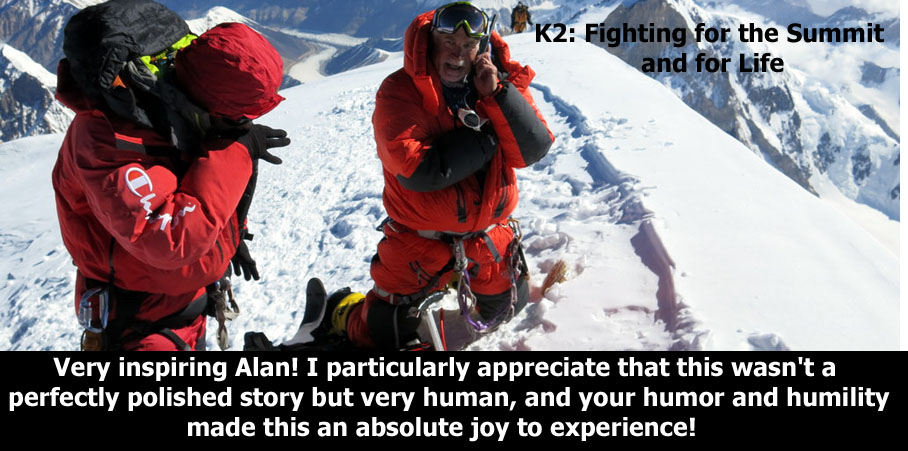
Alan Arnette is a Coach, Keynote Speaker, Mountaineer and Alzheimer's Advocate. Everest summiteer in 2011 and became the oldest American to summit K2 at 58 on his birthday July 27, 2014. Cited as "one of the world’s most respected chroniclers of Everest" by Outside Magazine. Summit Coach is a consulting service that helps aspiring climbers throughout the world achieve their goals |
||||||||||||
| Alzheimer's
Donate and Support
|
The Blog
Daily Updates
|
Summit Talk
Professional Speaking
|
Summit Coach
Climbing Coaching
|
Everest
2026 Coverage
|
||||||||
|
Everest, Denali, Aconcagua—what about K2? Regardless of your mountaineering goals, Summit Coach can help you prepare by selecting the best guides and gear and assisting with mental, physical, and emotional readiness. Alan Arnette has supported hundreds of climbers. Visit the Summit Coach website for affordable pricing and a wide range of customized services.
|
||||||||||||
The Podcast on alanarnette.com |
||||||||||||
Summit TalkAlan's influential speaking brings a new approach to motivation. His casual yet powerful style brings audiences into his high-altitude mountaineering with incredible pictures, videos, and stories while connecting with them on a real-world basis. Audiences leave entertained, educated, and motivated.
|
||||||||||||
 |
||||||||||||
| Alzheimer's | The Blog | Climbing | Speaking | |
|---|
Popular Content |
Mountains |
Resources |
Photography |
Editorials |
Community |
• Summit Coach |
most mountains include a photo gallery, FAQ page, essays and live dispatches |
|
www.alanarnette.com is provided for informational purposes only and not to be used for advice. see complete disclaimer |
Site Home • What's New? • Site Map • About & Privacy • Legal • Contact All rights reserved ©1999-2026 www.alanarnette.com |
