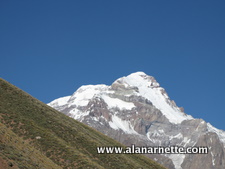
Kilimanjaro Gear
I leave for Kilimanjaro in a few days and have all my gear packed. My previous descriptions and videos of the gear I am using for the 7 Summits Climb for Alzheimer’s has been popular so I thought I would do one for this climb. Believe it or not, I have added a couple of new items that I needed for the unique nature of a Kili climb but otherwise will use most of the same gear I have on the previous 5 climbs. There is one huge exception – no crampons, ice axe, harness or other technical gear. It is not needed on Kilimanjaro. We will spend the vast majority of our time walking on well worn dirt trails with a few sections of easy rock scrambling. There may be some snow on the trail when we reach the summit crater but still no need for technical gear. All that said, Kilimanjaro has some unique aspects. We will start in the hot and humid micro-climate of a rain forest. Then gain altitude as we cross four more micro climates until we reach the summit. This is when things change dramatically. The summit day can be extremely cold. that I mean temperatures near 0F and if there is a strong wind, the wind chill can be extremely dangerous. This is not to be underestimated and is the cause of many missed summits. Another unique aspect of Kilimanjaro is that I will never carry more than my day pack with some water, a jacket – and my camera! Local porters will carry all the other gear as well as set up camp, cook, clean dishes – you know the stuff you never want to do at the end of a long day! It will be very much like a scene from the movie “Out of Africa”. I am excited to be climbing once again with International Mountain Guides. We can look at Kilimanjaro, in terms of gear, in two phases: Trek to High Camp Summit Bid If you have read my other posting about gear on Vinson, Aconcagua or Everest or looked at my gear list, (recently updated) you know what I am about to say about clothing in the mountains. It is all about layers and knowing what to use depending on the conditions and having it accessible on a moments notice. So with all this, I created a video showing what I will use on Kilimanjaro. Others will do it differently and there are no hard rules. Just whatever works for you is what I say. Finally, I don’t cover my communication equipment but I will be sending dispatches back to this website and Facebook pages on behalf the The 7 Summits Climb for Alzheimer’s: Memories are Everything. I hope this encourages you to get involved, learn about Alzheimer’s and make a donation. I hope you enjoy the video. Click here to download my Kili gear list in spreadsheet format. Climb On! Alan Memories are Everything
Everest 2011 Gear Recap
I know many readers are self proclaimed Gear Junkies so I thought a brief review of my gear I used to summit Everest would be of interest. As usual, search these are not endorsements and I always paid for my gear unless noted otherwise. Overall, I used the same items and techniques I have on 30 expeditions the past 10 years. There were four parts to my Everest expedition: trek to Everest Base Camp (EBC), life at EBC, acclimatization climbs from EBC to Camp 3 at 24,000’ and the climb from the South Col (26,300’) to the summit (29,035’). One more intro note. I tend to use the same clothes day in, day out and week in, week out. Many climbers bring changes for different situations and/or wash clothes often. I don’t. I have my favorites that I know I can count on. Trek The trek was on dirt trails that were very uneven sometimes requiring big steps over boulders but nothing technical or extremely strenuous. The temps were mostly mild but were cold in the early morning or after the sun went down, even in the teahouses which were not heated. I used my Mountain Hardwear Mesa convertible pants but never took the lower legs off. They wore well and never showed the dirt. My top was an Ibex pullover of merino wool with full neck zip. It was versatile for both warm and cool weather plus did not retain odors. I carried a second one in my pack to change into upon arrival to the teahouses each day and reused the other one the next day. My boots were the Kayland Vertigo High. They protected my ankles on the rough trails and were comfortable. Underneath, were Patagonia capilene briefs and REI merino wool expedition socks for padding. A key item was my Buff. I always wore it while walking the dusty trails and sometimes inside the teahouses depending on coughs and hacks. I wore a pair of Injinji poly/lycra gloves but they developed holes on the finger tips quickly; still looking for a lightweight glove that won’t wear out. I almost always wore a wool knit cap and my sunglasses were an inexpensive pair of Oakleys. My shell layers included the Marmot Ion windshirt, which I love for cool temps or breezes and the Patagonia Micropuff jacket with hood – this was my most used item for the entire 9 week expedition. I lived in it and climbed in it because it is warm, durable and lightweight. The current version is the Nano Puff jacket. In my pack was my computer (MacBook Air), Thuraya satellite phone, solar panel with cords (Feather 20), MSR hydration bag (Dromedary), sunscreen, a few Honey Stinger bars and gels, and the SPOT Locator clipped onto my pack top. I had rain pants but never used them. I brought my trekking poles but never used them the entire expedition. I had my Patagonia Hoody in my pack but rarely used it finding it too hot or too cold and my other layers worked better. Also I carried my Patagonia Jetstream hardshell for rain or extreme wind but never used it on the trek. Base Camp Life Base Camp conditions were a bit cold in 2011 with cloudy afternoons and snow showers. Night time temps were below freezing even in the tents. There was snow on the ground some of the time but mostly dirt and rock. I wore the same things 99% of the time. I usually wore a pair of merino long underwear bottoms, then the Mountain Hardwear Chugach (now called compressor) pant. This was comfortable and warm. Some people prefer jeans these days at EBC. My tops alternated between zip merino thin tops like I trekked with or a heavier fleece top depending on the weather and smell. My shoes were lined Chuggs, other wore running shoes. Same knit cap and sunglasses used on the trek and the Patagonia Micro Puff jacket when it was cold and every night at dinner. I had a pair of 40 Below synthetic booties but they did not keep my feet warm. In my tent was my ExPed down air mattress, which I loved and the Mountain Hardwear Phantom sleeping bag (0F). I put Nalgene water bottles filled with hot water at dinner plus put my MH Chugach pants at the bottom of my sleeping bag. This helped keep my toes warm. Acclimatization Rotations These climbs were on Lobuche Peak (20,000’), through the Khumbu Icefall, to Camps 1 and 2 in the Western Cwm on to 24,000’ on the Lhotse Face. The temps ranged from near 0F to over 100F in clouds and direct sun and on various snow and ice conditions. I started with the merino wool top and bottom base layer from First Ascent and REI merino wool expedition socks. I lived in my Patagonia Alpine Guide softshell pants. These are lined so they are warm and also protected me from wind and cold. I like their suspenders especially as I lost weight. My top was a heavier merino wool pullover with zipper for ventilation. Once again, I climbed in my Patagonia Micro Puff jacket occasionally using the Jetstream softshell in very windy conditions. I packed my Feather Friends 800 fill Volant jacket but rarely used it. I used the Hestra Alpine Pro gloves and they held up well with the tough constant clipping into and off the fixed line; occasionally my fingers got cold. Again, my head was protected with the knit cap but I now used the Jublo Explorer sunglasses which worked extremely well. My Buff was always around my nose and mouth warming the air as I inhaled. My boots were the Kayland 8001 (supplied by Kayland) which worked well until the zipper broke on one boot at Camp 2 and on the South Col causing serious problems. We held the boot together with duct tape and string; literally. I took the Mountain Hardwear Wraith -20F (supplied by MH) down
A Look at my Everest 2011 Gear

It is less than 3 few weeks until I leave and I have all my gear laid out on the floor. I like to stand and look at it for what seems like hours visualizing every section of the climb. I have my lists but I find it most useful to think through each section, imagining the worse and cases and be prepared. You would think I would l have it down by now! Everest is very different than all the other 7 Summits. First, find you never carry that much in your pack, illness or drag a sled. Then you don’t even worry too much about tents, food, stoves and fuel when you use a commercial logistics service like I am with International Mountain Guides. The Sherpas are an incredible asset to climbers like me as are the cooks, and porters. And let’s not forget the Zo’s and Yaks! All this support allows me to focus on staying healthy and the climb. I like to think of Everest, in terms of gear, in four stages: Trek to Base Camp Base Camp life Acclimatization Rotations Summit Bid If you have read my other posting about gear on Vinson or Aconcagua or looked at my gear list, you will know what I am about to say about clothing in the mountains. It is all about layers and knowing what to use depending on the conditions and having it accessible on a moments notice. The other story line for Everest is life at Base Camp. You spend weeks on the Khumbu Glacier living out of 48 square feet or less. This is where you sleep, think, get some alone time to think and read or write in a diary. It is home and it must be comfortable. So with all this, I created a video showing how I approach Everest. Others will do it differently and there are no hard rules. Just whatever works for you is what I say. Finally, I don’t cover my communication equipment but I will be sending dispatches back to this website and Facebook pages on behalf the The 7 Summits Climb for Alzheimer’s: Memories are Everything. I hope this encourages you to get involved, learn about Alzheimer’s and make a donation. I hope you enjoy the video. What follows is a discussion on my gear approach along with some brands I use. Also, please see my gear list page for the entire list. Again, everyone has their favorites but this is what has worked for me on many mountains and many years. Dressing for Everest What do you wear when the temperature goes from 100° F to 10° F in a matter of minutes? Oh and you have to carry everything in your backpack. Oh and the wind may go from calm to gale force. Ok, let’s not forget a blinding whiteout. Exaggeration, Hyperbole? No, it is the Western Cwm on Everest’s South Col route. Clothing is one of the most important investments high altitude climbers make. It literally becomes a matter of life and death during the climb. The short answer to the dilemma is layers. In other words a well thought out system of varying weight layers of clothing that are easily removed or added as the conditions change. There are three basic levels: wick, warmth and wind/snow. Let’s take them one at a time. Removing the moisture from your skin is the key to maintaining a warm, comfortable and safe climbing environment within your clothing. There are several ways to manage this moisture. Most climbers were very lightweight capilene or merino wool next to the skin. This layer wicks the moisture away from the skin and, hopefully, evaporates. The other advantage of this layer is that is dries quickly. You always hear never to wear cotton while climbing, this is because it does not wick nor dry quickly. A layer of wet clothing against your skin can accelerate hypothermia, frostbite and even death. Many climbers have suffered this fate thus the importance of the base layer. The next layer is for warmth. There are many choices here depending on personal preference and/or conditions. I like a medium weight pull over top like the Patagonia R1 Hoody and/or a full body suit such as the Mountain Hardwear Power Stretch suit. It is made of a medium weight fleece that breathes thus allowing moisture wicked away from the skin to pass through. The final layer is for protection against wind and snow. The standard for high altitude is down. On summit night, there are two approaches – a full down suit or separate down jacket and pants. The full suit has the advantage of no gaps at the waistline. This is important when you are bending over to clip in or reaching for difficult holds. In high winds, this gap can “leak” and destroy your carefully designed cocoon. You can also sleep in a full suit and bring a lighter sleeping bag to the high camps. The disadvantage is that when it warms up, you cannot easily strip down. The standard procedure is to pull the top down and wrap the arms around your waist. This is very bulky and is still hot. A separate down jacket has the advantage that it can be used in camps, during rest stops and during the climb. Paints have the same advantage. Down is the warmest insulating material but becomes useless when extremely wet. Primaloft or synthetic down avoids this problem but is not as warm. Most climbers select down for their critical layer at high altitudes. Finally, protection for the hands, head and feet complete the system. Again, layers apply here as well. Hands are protected with lightweight “liner” gloves followed by a wind stopper type material on a heavier glove. And for the highest altitudes, today many climbers used some version of ski gloves. While I will always have mittens in my pack, I now use gloves that allow me to remain protected yet have
Gear Review: Patagonia R1 Hoody and MICROspikes
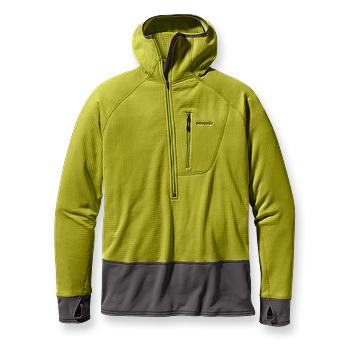
As I work my way through climbing the 7 Summits, stuff I am testing a few pieces of new gear both on the climbs and for training. First up is new to me, a mid layer for warmth – the Patagonia R1 Hoody. Patagonia has had variations of this style available for years but this new version is a strong winner. The other item are MICROspikes from Kahtoola. Developed by the grandson of the famous Gore family, here these are crampon replacements are designed for situations when the big guys are too much. I have been using them on my training climbs this winter and am very pleased. Gear Review: Patagonia R1 Hoody Gear Review: Kahootla MICROspikes Climb On! Alan
Aconcagua Climb Now Underway (video)

Wow, capsule it seems like I just got home from Antarctica and I leave for Argentina tomorrow! This will be the second climb of The 7 Summits Climb for Alzheimer’s: Memories are Everything. This time it is Aconcagua, the highest mountain outside the Himalaya at 22, 897′. This video show how I am packing for the expedition’s three parts: trek, climb and summit. As always you can visit my gear page for specifics on brands. I am climbing with International Mountain Guides. This is the tentative schedule but subject to change as always: Jan 15 Depart the United States. Day 02 Arrive in Santiago, fly to Mendoza, secure the permit and spend the rest of the day enjoying Mendoza and working a bit on individual gear. Hotel night included. Day 03 Early departure for Los Penitentes. Day spent packing loads, resting and generally getting ready to start our approach. Day 04 Drive to Punta del Vacas and begin approach march. Day 05 Continue approach march. Day 06 Reach base camp in the Guanacos Valley (13,000′). Day 07 Rest day at base camp. Day 08 Carry to Camp 1 (14,500′). Day 09 Move to Camp 1. Day 10 Carry to Camp II(17,800ft) via the Ameghino col and traverse to the Guanacos Helicopter camp (Guanacos route). Day 11 Move to Camp II/Helicopter Camp(17,800ft). Day 12 Carry to Camp III/High Camp(Piedras Blancas) at 19,500ft on the Guanacos route. Day 13 Rest/acclimatization day at CampII(17,800ft) Day 14 Move to High Camp(Piedras Blancas) at 19,500ft. Jan 29 First Potential summit day. Spend night at High Camp after summit. Jan 30 Contingency Summit Day Jan 31 Contingency Summit Day Day 18 Descend to Plaza de Mulas base camp(Normal Route) from High Camp Day 19 Hike out from Plaza de Mulas base camp to Penitentes Day 20 Drive from Penitentes to Mendoza and go out for a Celebration Dinner Day 21 Fly from Mendoza, Argentina Day 22 Arrive home I will use the SPOT tracker to show my current location and track throughout the climb so check the tab “Alan’s Last Location” on the Bog to see my daily progress. Note that it requires direct line of sight with the satellite and sometimes does not transmit if we are in deep valleys. So as always, no news is good news. I will be sending dispatches throughout the climb, weather and technology willing! So check back on this blog. You can also sign up for notification of new dispatches through the box in the right sidebar. Remember that you can donate $0.01 per foot I climb or $144 for Aconcagua. All donations go directly to research and none to Alan or to companies supporting the climbs. All donations are tax deductible in the US and support Alzheimer’s research. 100% for research Also, thanks to my supporters, Alzheimer’s Immunotherapy Program (AIP) of Janssen Alzheimer Immunotherapy and Pfizer Inc. Please visit out website for more on the campaign at climb4ad.com. Climb On! Alan Memories are Everything
Preparing For Aconcagua: Gear and Training
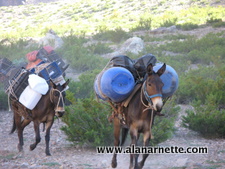
Having been home from my successful Vinson summit a few weeks now, my attention has shifted from reflection to planning. The next climb is Aconcagua in mid January. There are two major activities at this point: gear review and continued training. This will be the second climb in The 7 Summits Climb for Alzheimer’s: Memories are Everything. Of note, this one has the second highest vertical gain of all the climbs at 14,377 foot gain second only to Everest. First a bit on Aconcagua. It is both well-known and unknown at the same time. The primary claim to fame is being the highest mountain outside the Himalayas at 22,841′ or 6962 meters. Also being one of the 7 Summits as it is the high point for South America. It is located in Argentina near the border with Chile. It is not part of the Andes mountain range but on an adjacent range thus stands out prominently above the surrounding peaks. I will fly into Santiago, Chile then to Mendoza, Argentina to meet the rest of the IMG team. From there we will take a bus to Puente del Inca to start the trek to the high camps. I have summited Aconcagua twice, 2005 and 2008 both times via the False Polish route using the Vacus Valley approach. I used both climbs primarily as means of staying in high-altitude shape or for Everest training. Aconcagua has a reputation as an “easy” climb not requiring significant technical skills. That said, every year there are multiple deaths including two already in the 2010/2011 season. Weather is the largest challenge on Aconcagua. Given it’s prominence from other peaks, it creates it’s own disturbances. High winds regularly stop teams cold. In December 2010, the mountain came to a complete halt for several days with severe winds and cold. Summit temps can be well below zero. However, temps can approach 100F during the approach in the desert-like valleys. Also it is quite close to both the Pacific (100 miles) and Atlantic (~600 miles) oceans. In fact on a perfect day you can see the Pacific and sometimes the Atlantic from the summit. OK, so with that background, let’s look at gear. There are three very different requirements: trek, climb and summit. I try to leverage as much of the gear as possible in order to reduce the weight I need to carry. Aconcagua starts with a three day trek in desert valleys with extremely high temps and river crossings. So this requires light clothes yet sun protection and good boots yet something to protect feet when crossing streams. I will use zip-off nylon pants and a thin long sleeve base layer type top. My boots are high tops since the terrain is rocky and quite rugged. Good sunglasses and cap with a bandanna for neck coverage finishes off this section. Oh and lots of sunscreen is a must. Luckily on Aconcagua mules do the heavy lifting if you choose – and I do! So my pack on the approach will be a light daypack with a rain jacket, water and snacks. The mule train will deliver tents, stoves, sleeping bags and the rest each night up to the high camp near 14,000′. From there, we become the mules! As is usual on these climbs, layers are the order of the day. I will use my lined soft shell pants as my primary pant for the entire climb. I will regulate my body temp thru my top layers consisting of merino wool base layer, R1 Hoody, wind soft shell and cold weather down or primaloft jacket. As usual I will use my glove system and wool hats and buffs for hands and head. Above the 14,000 camp, I will switch to a lined double boot with a bit thicker socks. At this point we are hauling all our personal and group gear so I will use my large 85 liter pack and count on strapping pads and tents on the outside – especially on the descent. These loads are some of the highest of all the 7 Summits similar to Denali. On summit day, I will add another base layer of heavy polartech material, down pant or gortex bibs and my 800 fill down jacket. From experience, I know I will probably add and subtract layers throughout the day. We will also use an ice axe and crampons since some of the route will be on somewhat steep snow and/or ice. A quick update on a few new items I used on Vinson. My Kayland 8001 mountaineering boots were excellent. I found the fit good, temperature control excellent. I used a -20F Mountain Hardwear Wraith sleeping bag. It was great. I appreciated the detail around the hood baffles. Finally, I found the gels and energy bars from Honey Stinger to work for me like no other product. They are 100% honey but not too sweet. They provide a consistent source of extra energy without the highs and lows. You can see all my gear complete with the brands I use on my gear page. Training is never complete! Vinson was not a terribly physical expedition but I still lost a few pounds and a little muscle mass. So I have been lifting weights the past few weeks working on my upper body. Plus I am back on my regular schedule of an hour and half each day on the elliptical machines working on stamina with interval training. Of all the 7 Summits, Aconcagua is one of the most physical. The issue are the loads you carry after the summit to meet up with the beloved mules. Trust me they are a welcome sight after carrying 70lbs down thousands of feet on steep slopes. So training with loads is always excellent preparation. I plan on a few long day hikes with 40lb loads in the snow to 12,000′ before I leave but I am careful about injury at this point. My priority is to maintain my current
Mt Vinson Gear

As I get closer to leaving for Antarctica, it is time to layout all my gear and check, double check and check again. Overall, I will take almost the same items I used on Everest or other 8000m climbs even though Vinson is “only” about 5000m or 16,067′. It’s the Wind, Mr. Scott While temps can hit -40F, it is the wind that creates the extreme danger. Katabatic winds are the culprit. These winds come down from the high mountains sometimes at hurricane force bringing all activity to a halt, including flights in and out. Of note is the first flights for the 2010 season have been delayed over a week as of this post. I am limited to 50lbs of personal gear on the Russian IIyushin 76 cargo plane which will take us from the tip of South America, Punta Arenas, Chili to Union Glacier, Antarctica, basically a GPS coordinate on the ice at 79° 45’S 083° 14’W at 2,600 feet. Weather depending, a Twin Otter then takes us to Vinson Base Camp, located at 7200 ft on the Branscomb Glacier to start the climb. Layers The biggest challenge is to manage the heat and extreme cold; so as usual this calls for layers. I start with a base layer of Merino wool tops and bottom, another merino wool top (with zips for venting) then add a Polartec one piece suit. This is what I will live in the entire climb. The outer layer begins with a solid soft shell stretch pant. These are lined and wind resistant. On top is a heavier wool hoody with a full zip or a lightweight wind shirt (with hood) if I need a bit more warmth but no serious wind protection. As the wind picks up or I get cold, I start to add layers. My first line of defense begins with a soft shell wind resistant jacket or a lighter down jacket. At this point I begin to get serious about hand and head protection. I always have my wool cap on plus a pair of lightweight gloves. As I get cold, I simply pull my hood up since it is rare for me not to have a hood on something I am wearing. I use a glove system that goes from liners to wind protection to serious cold protection to full mittens depending on the conditions. They are all available on an outer pack pocket or on the top inside my pack for easy access. A thick balaclava protects my entire face when needed. My glacier glasses never come off and are always attached with a strap. Like my mittens, my goggles are never far away. Extreme Protection For Vinson, I am keenly aware that the weather can change a moments notice so having access to my last layers is the difference between begin uncomfortable or worse. On my legs goes down pants and for the ultimate my full Gortex bibs with full length zips so I can get them on in under a minute while wearing crampons. On top goes my 800 fill down jacket with full hood. And the piece de resistance is my Gortex hardshell, with hood. Remember, my goal is to never have more than 3 layers, not including my wool base top and bottom, on at any one time so a bit of quick change is required. Something I have been practicing on harsh training days. All my clothes are packed unzipped, including full length leg zips to allow for a quick addition. If I am still cold at this point, it is time to crawl back in the tent and my -20 bag! Last thing to cover are the feet. I am using an integrated gator/boot system with an insulated inner boot. Two pairs of socks, one light and one a bit heavier do the trick. So this is what it all looks like laid out on the floor: Odds and Ends A few more items are my technical gear for climbing: harness, crampons, 70cm ice axe, jumar, caribiners, prusiks, cord and crampons. I also have two water bottles with insulators, small thermos, cup and bowl. I have not mentioned but also critical are some meds and personal toilet items. For me I also carry my electronics so I can send dispatches. This starts with a satellite phone and PDA plus a small solar panel and various cords. Of course I have my camera and POV video camera. On thing not needed on Vinson is a headlamp since the sun never sets in November! All of this goes in my85l pack. In addition, I am hauling a sled which is tied to my pack. Somehow all my personal gear plus some group gear including parts of tents, food, stoves, fuel, etc. is split between pack and sled. By the way, this is almost identical to the scheme on Denali. If you want to see more specifics on brands and models, take a look at my gear page where I list all my gear and note my favorites. One of my goals with the 7 Summits climbs is to create what I am calling the Ultimate 7 Summit gear list that shows what works across all 7 climbs. I’ll report back after Vinson and let you know what is different for Aconcagua, the next climb. Climb On! Alan
Gear Review: Tents, Poles and Packs oh my!
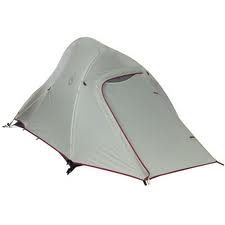
One of the benefits of climbing is it requries gear. As they say, the difference between men and boys is the price of their toys. This goes for the ladies but it doesn’t rhyme as well. Anyway, ed I really don’t a lot of gear anymore since I have my favorites but when I do I research my options and try to get what I think fits my needs. Sometimes it works, thumb other times, it is a learning experince. I just posted three new reviews for items I am using quite a bit this summer in my Colorado mountains. First up is the Black Diamond Trail Shock Trekking Poles, an invaluable item to keep my old knees, well old. Next my goto backpacking tent, the Big Agnes Seedhouse 2. A 3-season model that has seen some tough times. And finally, a new addition to my pack collection; the REI Flash Pack. I use it as a summit pack after a long and heavy approach. My goal with the reviews is a quick read that shares my real-life experience with a bottom line for each review. Read more on these at the Gear Review. One more thing, I will be attending the Outdoor Retailer show in Salt Lake City in August 2010 where I will see the latest in climbing, camping and outdoor gear. I am excited to see if I need to update my favorites with the latest. I will be tweeting from the show and posts some thoughts when I return. Climb On! Alan
Gear Reviews: Ice Tools, Base Layers and Gloves
One of the great things about climbing after Christmas is chance to try out all those new toys you got over the holidays as gifts or on . And I am guilty as charged! I recently went ice climbing in Ouray and then made the summit of Colorado 14er, Quandary Peak in temps well below zero and winds gusting over 30 mph. Perfect time to try out new gear. In Ouray, I used my new Black Diamond Cobra ice tools for the first time. I had bought them on at the BD site and was anxious to see if they lived up to their well-earned reputation – I was not disappointed. Over on Quandary, the harsh conditions were perfect to try out some new products from First Ascent, their merino wool base layers plus my new Hestra leather gloves. Let me say, my body never got cold. To read all the details, check out the reviews on each piece at Gear Review. Climb On! Alan
ing Climbing Gear Online
Everybody wants a deal. Houses, cars, beer and of course, climbing gear. Thus an entire industry has emerged over the years to serve this “price sensitive” market online. After all why pay $500 for that down jacket you need – yes you need it – instead of say, $99? I know I most of my gear online these days. It is safe, easy and convenient. I have about 5o gear sites bookmarked and check them all when looking at a big . I have my favorites sites like Mountain Gear, Spadout and I have come to use Backcountry’s Steep and Cheap more often than I should – more on that later. Obviously the biggest benefit of shopping online is the ability to compare prices – if you know what you want. And the manufactures’ sites provide excellent descriptions so if you are looking to upgrade or replace an item, there is no need to actually visit the store – unless you are unsure about sizing; especially footwear. Most sites have excellent return policies to encourage us to press that ” now” button so the risk of being stuck is low. Let’s take a look at these online gear retailers and see if they really offer a good deal – for you. Full Line, Full Service, Full Prices The first tier are full service, full line sites that have real humans answering the phone, fair return polices, excellent product descriptions and the capability to compare multiple selections – all this is the bare minimum. Sites I would put here include: Altrec Backcountry Moosejaw Mountain Gear REI We Don’t Do That Then there are the more narrow sites specializing in a certain aspect of climbing: Mountain Tools – pro, tools, ropes, shoes, etc. Climbing Gear – pro, tools, ropes, shoes, etc. ProLite Gear – lightweight backpacking GoLite – Adventure racing, lightweight gear The Mother Ships Of course, there are the manufacturer’s sites. This is where it all begins and an excellent source of first hand product information including construction materials, country of origin and the full catalog. I have found that many of the general sites simply use the same product description from the manufacturers but here you can see their full line and are not limited to what the reselling site carries. Some of the favorites out there include: Arctryx Black Diamond Feather Friends First Ascent Marmot Mountain Hardwear Patagonia Outdoor Research The North Face Yea, But Where’s the Deal? Ah, the DISCOUNTERS! This is what you were waiting for, I know 🙂 All the other sites previously listed have plenty of s and some have dedicated outlets (REI, MooseJaw) and others have frequent holiday and weekend s (Mountain Gear). However, the selection is usually very narrow with limited sizes XXS and XXL in Neon Orange so getting what you want is rare. Finding the Deal These next sites have made discounting into an art form. Steep and Cheap, part of Backcountry.com, has a loyal following for good reasons: great prices and outstanding customer service but only offer a handful of items each day. I use their notification slider on my PC that shows new deals frequently throughout every day. If it interest you, simply click on the slider which takes you to their web-page with that product. But you have to act quickly since the section is often limited in styles and quantity. Two new discount sites launched this week both using an interesting approach of having to be invited to join before entering the site. But I requested an invite and quickly received them. The Clymb is using social networking on twitter and Facebook plus the limited access to build momentum. They launched with a of Ice Breaker wool tops and now are in the middle of a 3 day Sunoto watch . In addition to discounted prices, they have a green theme that encourage ers to reduce their carbon footprint. The other new entry, is from Backcountry.com and is called Department of Goods. Instead of a limited offering or a short time based of a single item, this site has a full line of products at good discounts -albeit without all sizes and styles available. They have a nice deal of comping your 10th ! Steep and Cheap The Clymb -invitation only Department of Goods – invitation only I Need a Sherpa! All this can be time consuming and very confusing so a few sites offer a shopping service. The one I have found is Spadout . They have a nice search engine, community and some reviews. If they have what you want, simply ask the site to show the prices from multiple sites and even to monitor it if the price drops. It is a great way of getting the deal you want without spending days switching between sites. Another version on this theme is from Gear Attack and Google’s Shopping or Ebay but they lack the sophistication of Spadout. A Test Drive So, let’s do some shopping. Here is my shopping basket with the list price from the manufacturer’s website: Mountain Hardwear Men’s Sub Zero SL Hooded Down $275 Mammut Infinity 9.5mm Single Rope $229 North Face Dark Star 0 degree sleeping bag $299 Black Diamond Bibler FitzRoy Tent $699 I won’t bore you with all the details but after getting calluses on my finger tips after searching all the sites mentioned in this post for my shopping list, I found that almost every site offered every item at list price – so where are the deals? By using Spadout, I found some sites I was not aware of such as Sunny Sports. While I did not actually order any item, I completed the checkout process to see if the final price was what was advertised and it was. But I have no idea of return policies, accuracy in shipping dates so it remains er beware for site new to you. Here are the results: Mammut Rope FitzRoy Tent North Face Bag MH Jacket Altrec